How to create a contact
How to create a contact step by step.
- Go to the Contact/Co. module.
- Select Contact.
- Click on Add Contact.
-
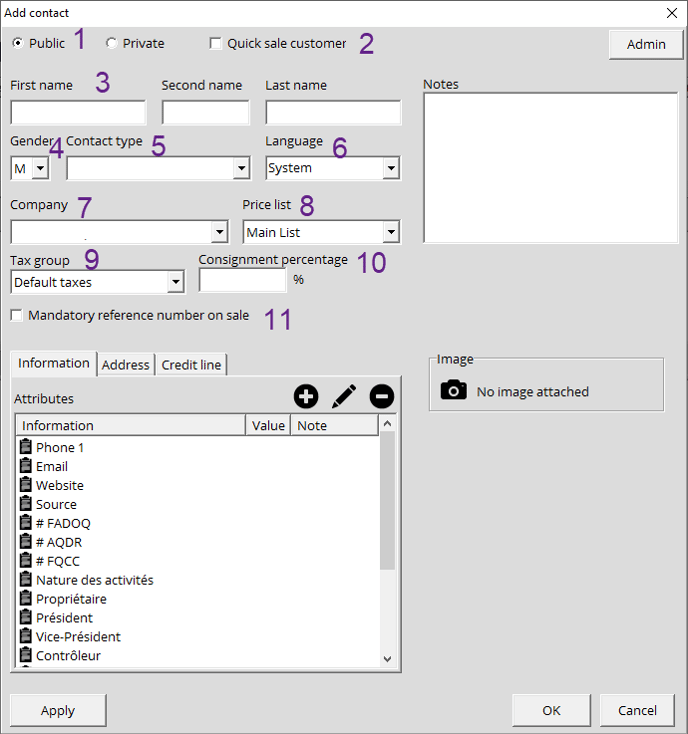
The Add a contact window will be displayed:
- Select if it's a public or private contact.
- Determine if it's a Quick Sale Customer.
- Add first and last names. The second name is optional.
- Gender.
- Contact type: You can assign a contact type.
- Language: Ideally select your contact's native tongue so they can get their invoices and emails in the proper language.
- Company: If your client is an employee of a company that deals with your store, you can associate them with it.
- Price List: Select a previously configured price list for your client if applicable.
- Tax Group: You can also assign a tax group if applicable.
- Consignment Percentage: If your client provides your business with consigned items, this is where you'd specify the percentage if need be.
- Mandatory reference number on sale: Once this is enabled, every time the contact will make a purchase, the clerk will be prompted to ask for a reference number before doing the invoice.

