
Entering an item into Consignment
Before entering an item into consignment it must be created as a Serialized item in your Catalog.
In your invoice module:
- Select the '...' icon on your right-hand side, and click on Consignment * this enables the transaction mode to enter items into Consignment.
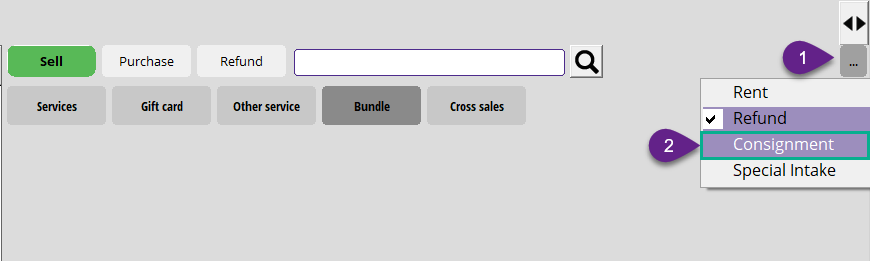
- Once selected, you will see the Consignment mode activated in yellow, and can proceed to add your customer/supplier's contact information by searching for their name under the customer search bar.
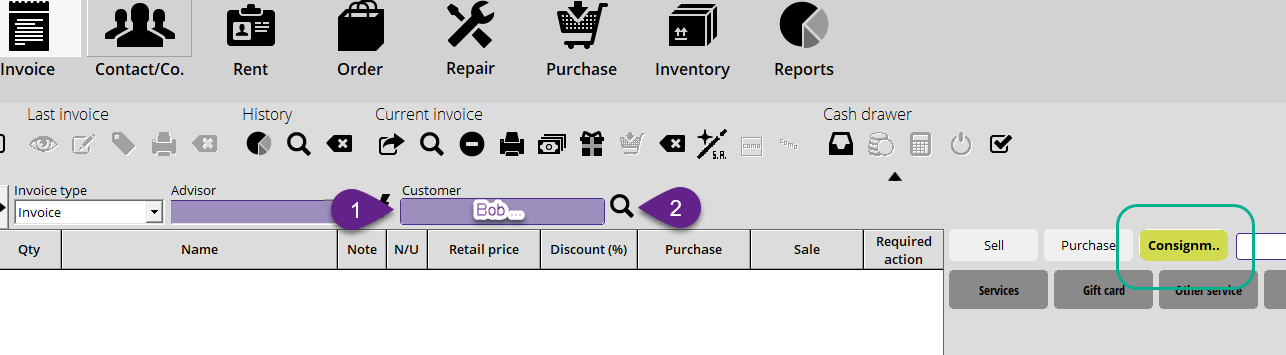
* If your contact is not yet created, you can create it directly from the search window that will pop up, selecting and Contact
  , for more on creating contacts in Alice read this article.
 - Proceed to search for the item and/or create it directly from the search function as needed. *the item must be serialized for consignment to work
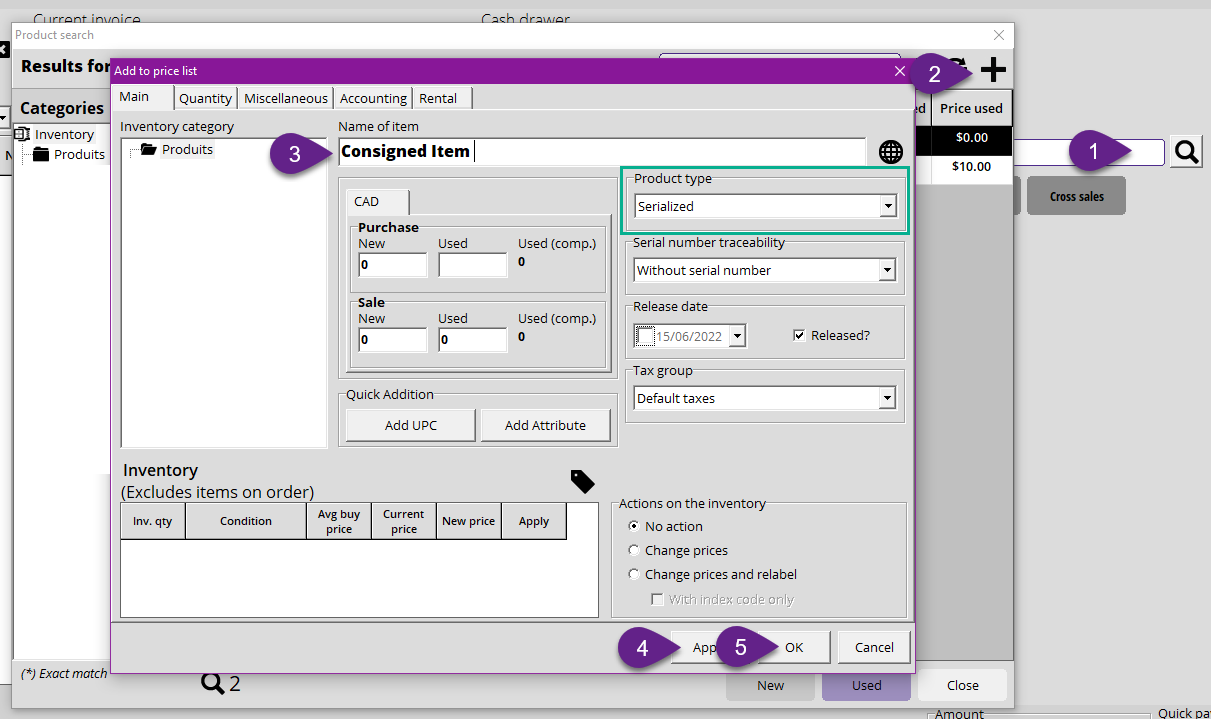
- Set the retail price for that item, keeping the catalog price or directly applying it to the item in the invoice window.

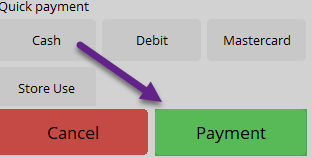
- Once all your consignment items for that client are entered and validated, select Payment, at the bottom right corner of your screen.
- In the Finalization window, make use of the Label option, this will ensure the items you entered into consignment will each have their unique label.
This was created to make it much easier to follow your sold and owed consignment. Without a label, you will need to manually select the correct item from inventory when selling it in order to avoid errors.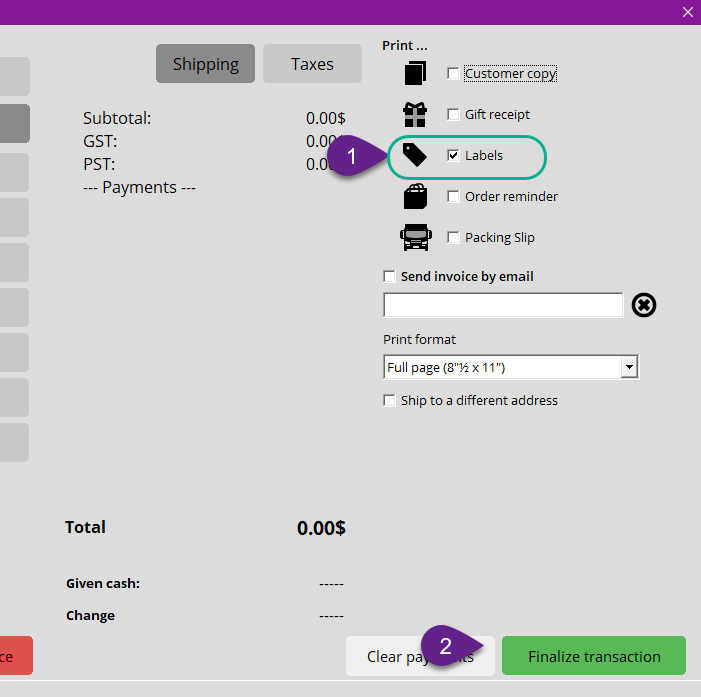
Your items are now entered into consignment with their unique Id linking them to your supplier/client when sold.
Setting up Consignment in Alice
There are three ways to determine the amount that will be owed to your vendor for sold consignments, and what you will keep as profit.
Here they are listed in order of priority:
- Setting the buy price when entering the item into consignment (on a per item basis)
- Setting a consignment % of what the store will keep for a specific Contact
- Setting a consignment % of what the store will keep as a General rule
This order of priority determines which amount will apply on a consigned item. Examples will follow.
Entering the item into Consignment with a set Buy price
When entering an item into consignment, there is a Purchase field where you can pre-set the amount you will be keeping from the sale of that specific item.
Say you were entering an item to sell at 10$, and agreed with the supplier/contact that you will keep 5$ and pay out 5$ when sold, you would enter the following:
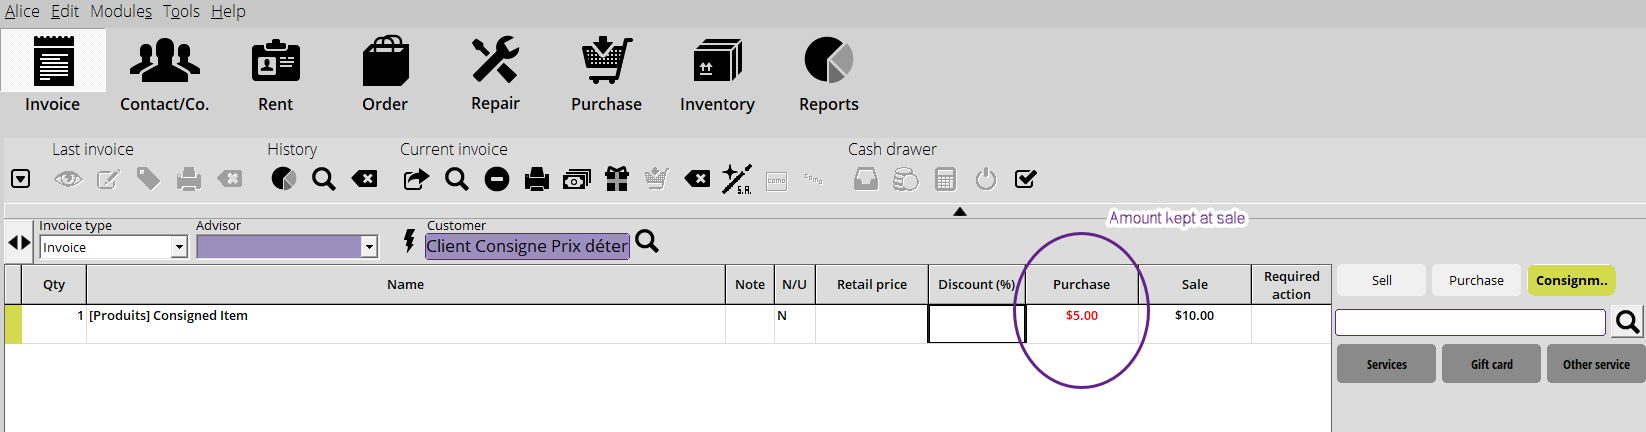
The act of setting a purchase price directly on entering the item will override any general store % or contact specific %.
Contact Specific Consignment %
If you have an agreed upon percentage with a supplier/contact, you can set this directly in your contact's details.
In this example, the Store will keep 70% of the consigned item's sale price when the item is from this specific contact. 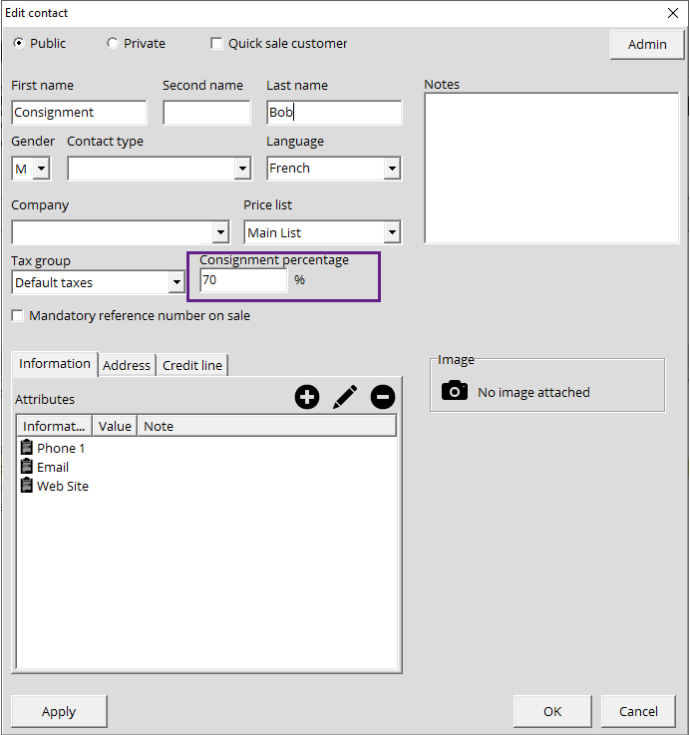
In the case of the previous example item, the 10$ consigned item would be sold, and the store would keep 7$ and owe 3$ to their client/supplier.
This will be the case, unless an item specific purchase price was entered when the item was first consigned
General Store Consignment %
For items you are entering into consignment without a set purchase price, and with no preset contact specific consignment percentage, you can set a General store percentage.
To do this, go to your Setup, select the Invoice tab, and proceed to page 5.
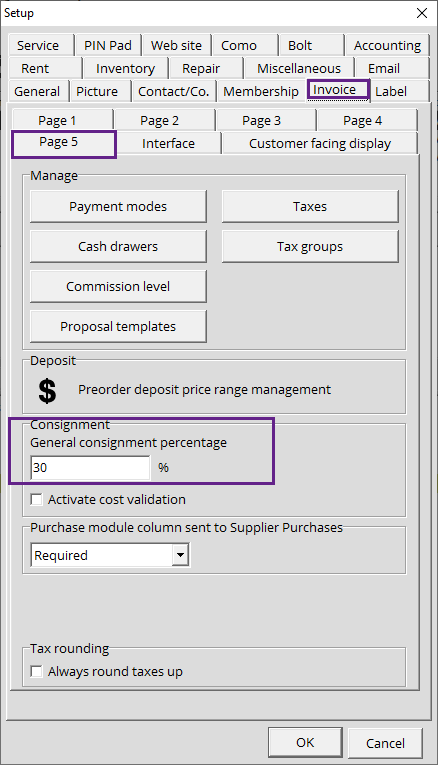
In the above example, if sold a consigned item for 10$, the store would keep 3$ and pay out 7$ on that item.
The General consignment % will only apply if there is no purchase price set when consigning the item, and if there is no contact specific % set for your contact/supplier.
How to pay out sold consignments
Once you have sold a consigned item, Alice will mark it as owed and base the owed amount on the % or purchase price that applies to that item.
When your client/supplier comes in, you can pay out their owed consignment by:
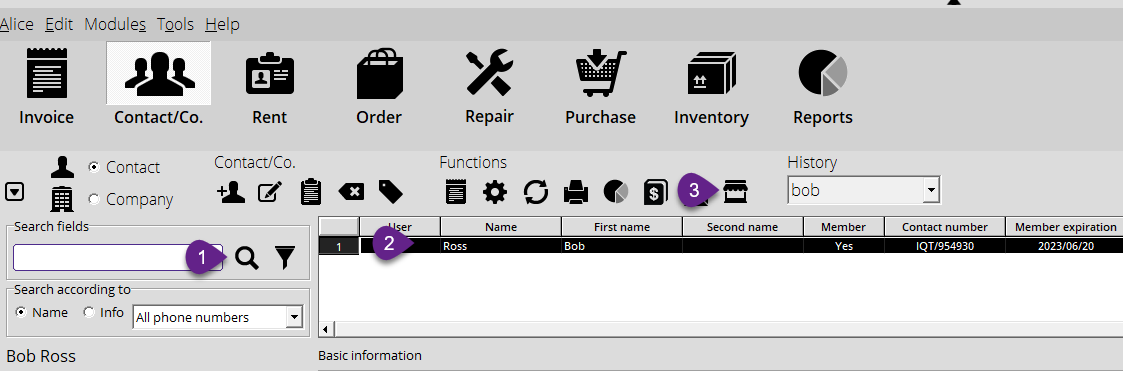
- Going to the Contact module, and searching for their contact file.
- Select the contact/supplier whose consignments you wish to manage.
- Select the consignment icon to view your supplier/client's existing, owed, and paid consignments.
- When your client/supplier comes to verify their products with you, you will see in this window all Active consignments, sold consignments, paid consignments, payments, and cancelled consignments for their contact.
Any amount due on sold consigned items will display at the top under consignment information.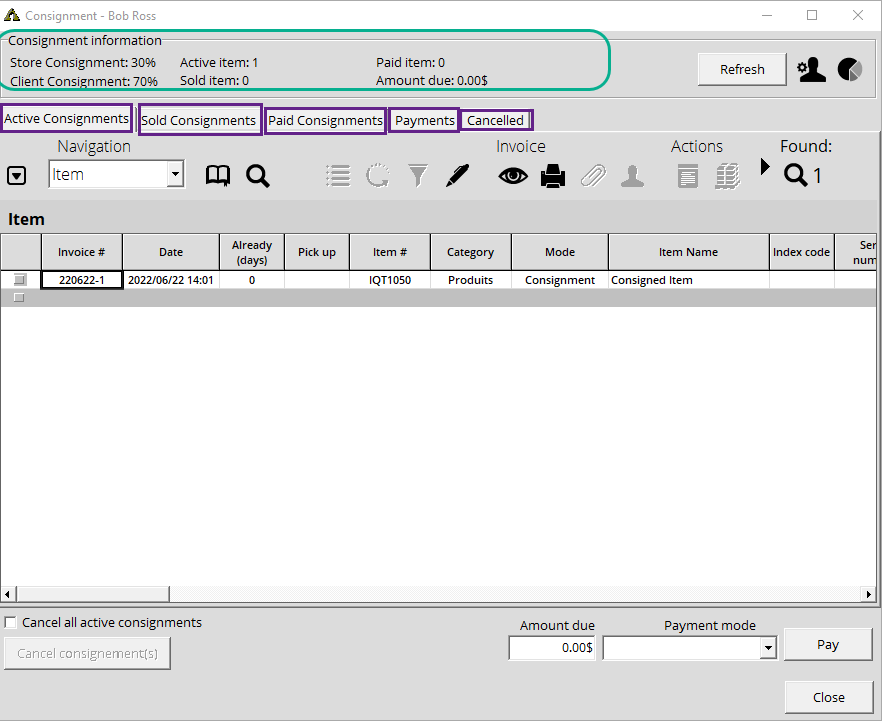
- To pay the amount due on your sales, select the Sold Consignments tab and check off the items you will be paying out.
This will auto-fill the amount due, and you can then proceed to select the payment mode; and pay.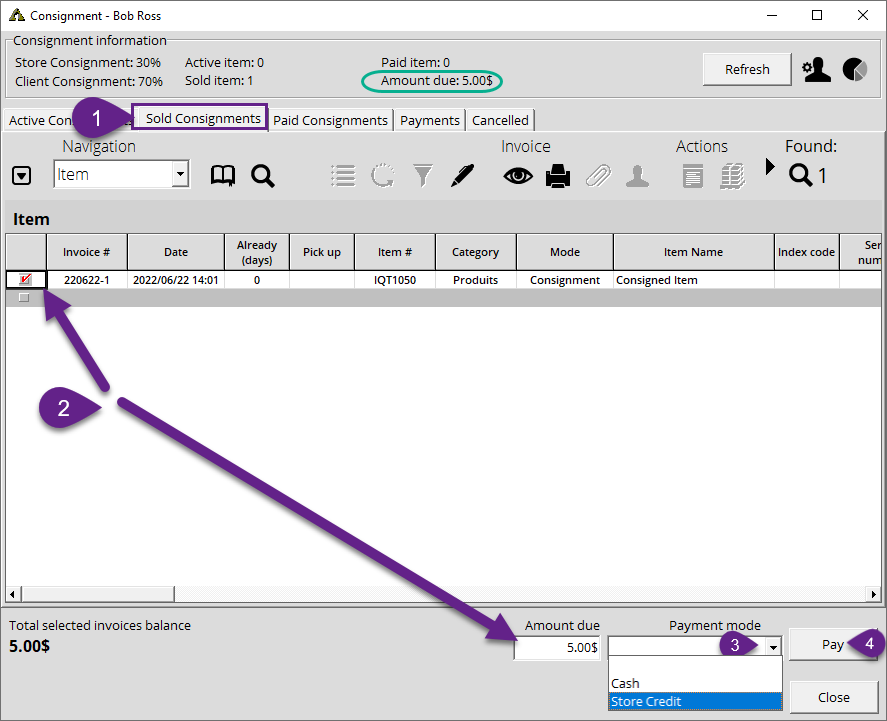
- The amount due will be reduced by the payment made, and the paid consignment will show under its respective tab, as well as payments.
A full report on consignments can be issued out from the Report icon within the consignment window for that specific contact/supplier.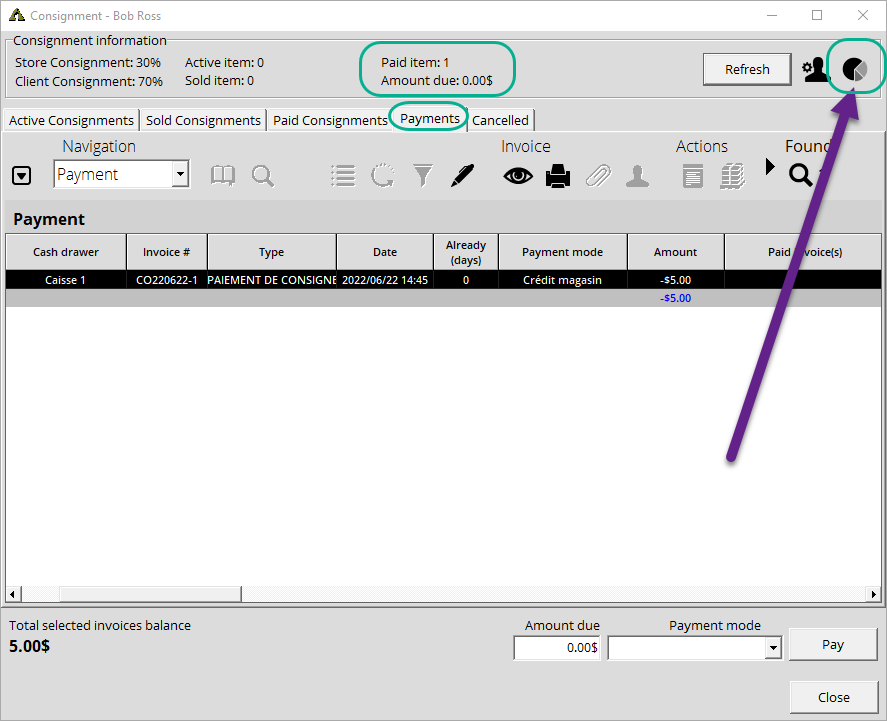
If you have further questions on consignment, feel free to log a ticket with our support team, or direct your questions and scenarios to your onboarding specialist if you are in the onboarding process.