
The Invoice tab allows you to manage options related to your transactions.
Page 1
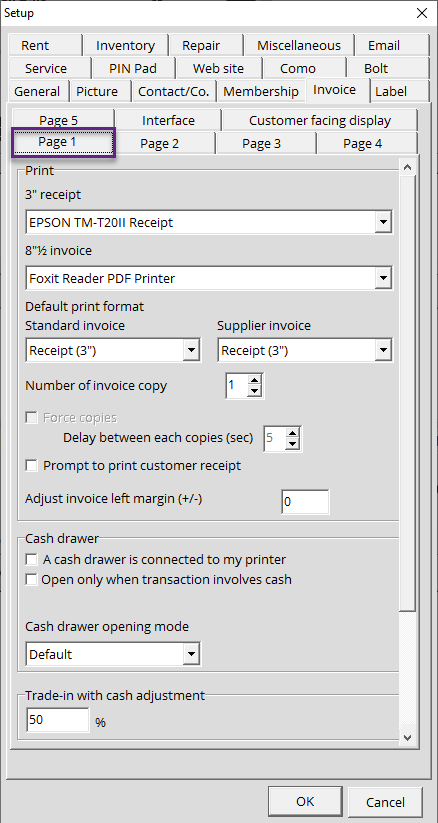
This section allows you to manage your main printing formats:
- 3" receipt: Lets you select which printer to use to print 3" receipts.
- 8"½ receipt: Lets you select which printer to use to print 8"½ receipts (8½" x 5½" and 8½" x 11").
Default print format section
This is where you manage the configurations related to your paper and thermal printers.
- Standard invoice: You can set which format to use for printing sales receipt (3", 8½" x 5½" or 8½" x 11").
- Supplier invoice: You can set which format to use for printing supplier purchases (3", 8½" x 5½" or 8½" x 11").
- Number of invoice copy: You can set the number of invoices to print for each transaction. Please note that this also includes a customer copy.
- Force copies: Some types of printers require a short pause between each copy printed (whether it be for invoices or labels). The Force Copies option lets you set the time between each copy printed. Just enable it and set the time, in seconds, you want between copies.
- Prompt to print customer receipt: You can print additional copies for your contact if they require one.
- Adjust invoice left margin (+/-): You can adjust the margin of your invoices if needed.
Cash Drawer
This section allows you to manage the interactions between your cash register and Alice POS.
- A cash drawer is connected to my printer: Enabling this will open your cash register during every transaction.
- Open only when transaction involves cash: Enabling this will open your cash register only during cash transactions.
Cash drawer opening mode
- Default: This is the default mode used for cash registers to open when using EPSON receipt printers.
- CBM: If you are using a Star brand receipt printer, you will need to set this option for the cash register to open.
- EsPOC: This option has to be selected if you're using another receipt printer besides an EPSON or a Star device for the cash register to open.
Trade-in with cash adjustment
You can specify a percentage to be deducted from the cash amount when purchasing items from your customers.
Page 2
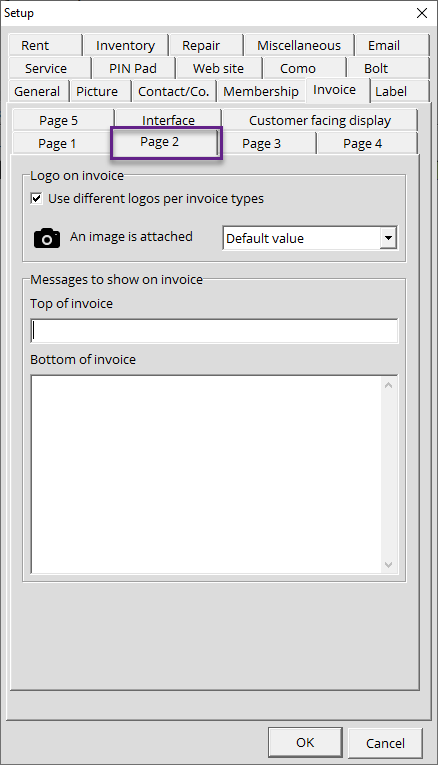
Logo on invoice
Use different logo per invoice types
Enabling this will allow you to select a different logo for each invoice type. By clicking on the camera icon, you can add your company logo so it's displayed in the top left corner of your invoices. If Use different logo per invoice types is enabled, you can select the Invoice type in the drop-down menu next to the camera icon.
Messages to show on invoice
This section allows you to add messages at the top and bottom of your invoices.
- Top of invoice: You can add a short message which will be displayed at the top of your invoices, such as your company slogan.
- Bottom of invoice: You can add a message that will be displayed at the of your invoices, such as your return policy.
Page 3
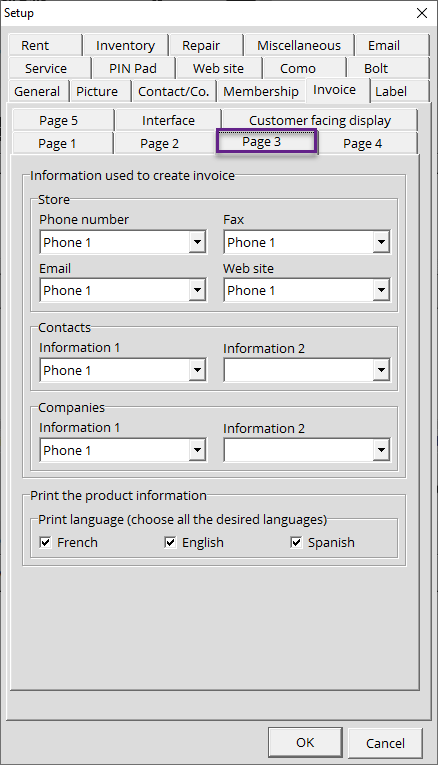
Information used to create invoice
You can choose which store and customer information you want to display on your invoices. Simply select the items from the drop-down menus and they will be displayed at the top of your customer invoices.
Print the Product Information
This option allows you to chose which language will be used when printing out items added on invoices. Please note that for this to work, you need to fill out the International section (Planet icon) for each product in the Inventory module's Catalog.
Page 4
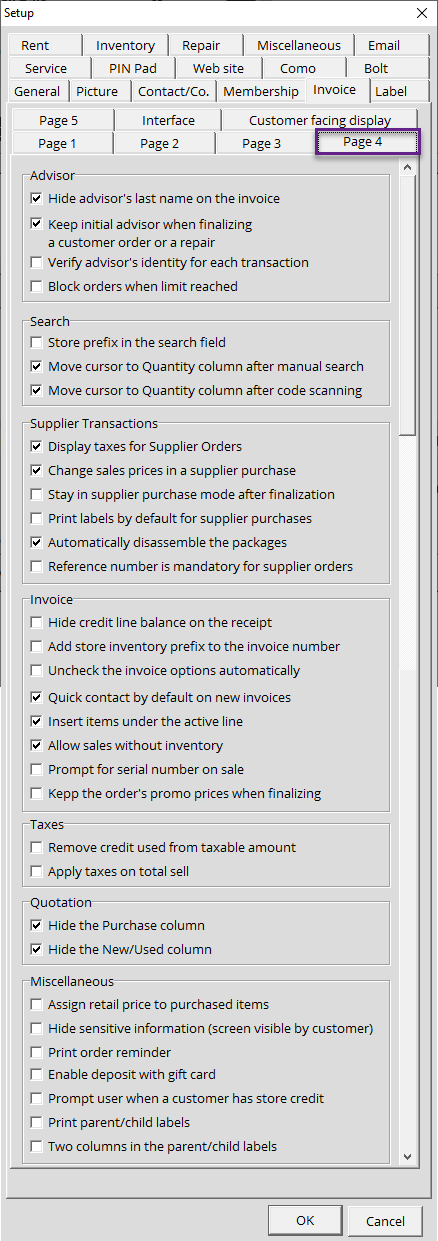

The configurations on this page will be propagated across your entire network.
Advisor
Customizable employee's specific options.
- Hide advisor's last name on the invoice: Enabling this option will remove your employees' last name from invoices for confidentiality purposes.
- Keep initial advisor when finalizing a customer order or a repair: Enabling this option will leave the name of the original employee who made the original order/repair on the invoice.
- Verify advisor's identity for each transaction: Enabling this option forces employees to log in for each transaction.
- Block orders when limit reached: If certain items are limited in quantities, you can block future orders once the item has been sold out or max pre-orders have been reached. This is a video game specific option as it tailors to pre-ordering new games.
Search
- Store prefix in the search field: This option will display your store prefix in the product search engine in the Invoice module.
- Move cursor to Quantity column after manual search: The cursor will move to the Quantity column after a manual product search.
- Move cursor to Quantity column after code scanning: The cursor will move to the Quantity column after scanning a product.
Supplier transactions
- Display taxes for supplier orders: Enabling this option will display taxes on your supplier orders.
- Change sales prices in a supplier purchase: Enabling this option makes it possible to change item costs in a supplier purchase without affecting catalog prices. This option is very useful for stores that are networked and their price list are not to be modified or it's Master dependant.
- Stay in supplier purchase mode after finalization: This option is designed for businesses that have a workstation configured for receiving purposes only. When you finalize a supplier purchase, the next invoice will remain under the Supplier Purchase invoice type.
- Print labels by default for supplier purchases: Enabling this option will automatically print labels for the received merchandise once you finalize a Supplier Purchase.
- Automatically disassemble the packages: This option allows you to automatically disassemble packages linked to a child product once the parent product has been entered with a supplier purchase.
- Reference number is mandatory for supplier orders: Enabling this option will impose adding a Reference number before finalizing a supplier order.
Invoice
- Hide credit line balance on the receipt: Some businesses have requested that the balance of the line of credit be hidden on the invoices for confidentiality reasons. Check this box if this is the case for you.
- Add store inventory prefix to the invoice number: This option can be used by merchants who have multiple stores to navigate through their invoices.
- Uncheck the invoice options automatically: Enabling this will automatically disable the options to print the invoice, order reminder and automatically sending an email when completing a supplier purchase.
- Quick contact by default on new invoices: Enabling this will always have the Quick Contact as the default customer on every invoice.
- Allow sales without inventory: This option will let users sell items from the Catalog which has a quantity of 0 in stock.
- Prompt for serial number on sale: This will prompt users to input the serial number of the item being sold.
- Keep the order's promo prices when finalizing: If an order is placed with an item that's eligible for a promotion and finalized once the promotion has expired, the customer will pay the promotion price.
Taxes
- Remove credit used from taxable amount: This option allows you to reduce the taxable amount on your invoice. Check with your accountant if you can use this feature.
- Apply taxes on total sell: Instead of calculating taxes by item, this option will calculate taxes on the total amount of the invoice.
Quotation
- Hide the purchase column: Removes the Purchase column from the printed quote.
- Hide the New/Used column: Removes the N/U column from the printed invoice.
Miscellaneous
- Assign retail price to purchased items: When buying used items, the system can use the sale price of the Item automatically if one is set in the Catalog. Otherwsie, the item will be located in the "Labeling" folder of the Inventory list.
- Print labels even if no retail price: This option allows you to label your serialized items without displaying retail prices.
- Hide sensitive information (screen visible by customer): For the sake of privacy and security, you can check this box to hide sensitive information on the screen that the client sees.

This configuration is the only one of this section that is per station. You must enable it on each computer for it to take effect.
- Print order reminder: When finalizing a Supplier purchase, the system will check for active orders and print a list of the customers' orders completed following the completed supplier order.
- Store prefix in the search field: This option will make searches for serialized products faster and more efficient.
- Enable deposit with gift card: Enable this option to accept gift cards as a deposit for customer orders.
- Prompt user when a customer has store credit: Enabling this option will prompt an informational window when a customer has store credit they can use.
- Print parent/child labels: The label will print the child item if applicable. For example, if you sell a coffee (Parent item) and milk (Child item), both items will be displayed on the same label. Note: This replaces the "Print Label when Selling" option.
- Two columns in the parent/child labels: The parent/child items will be printed on two columns.
Page 5
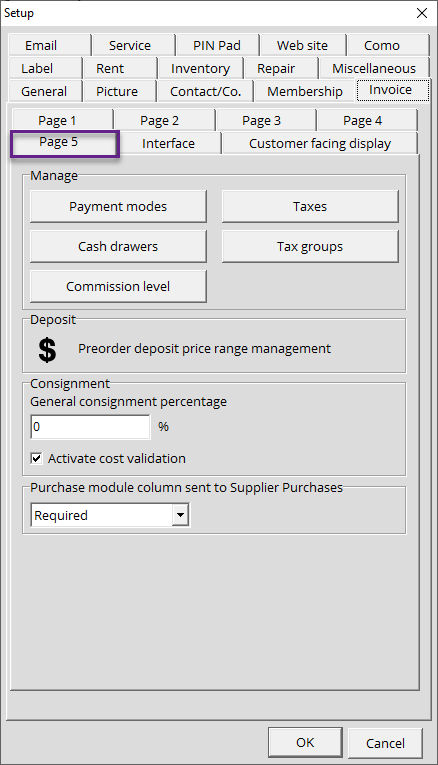
Manage
This section is primarily used to configure information pertaining to invoicing and transactions.
Payment modes
This is where you will configure your payment methods. You can create as many payment methods as needed.
How to create a Payment mode?
- Click on the Setup icon at the upper right of your screen.
- Select the Invoice tab Page 5 tab.
- Select the Payment mode button.
- Click the item to add a Payment Method.
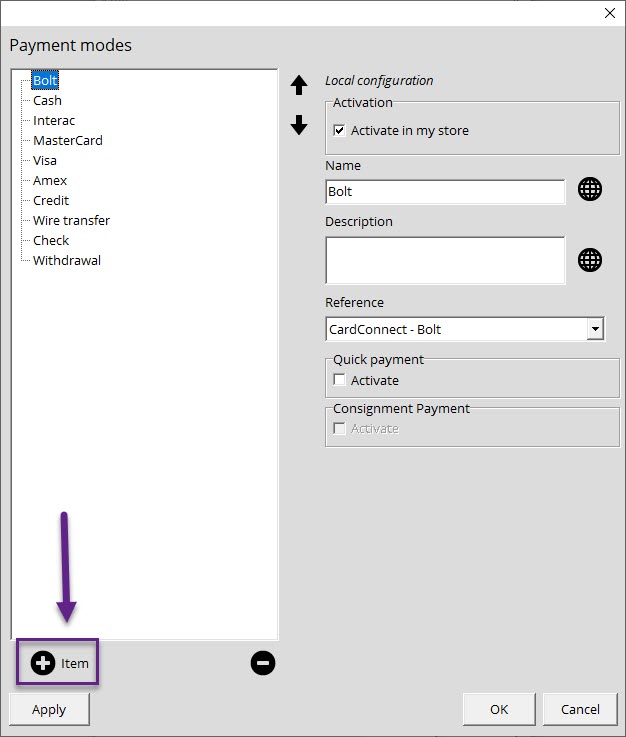
- Name the element; "Cash" for example.
- Click the Reference drop-down menu and select the payment type that matches the payment method you created. If you want this payment to be available in your Invoice interface as a Quick Payment method, make sure to check the "Activate" box in the Quick Payment section.
- Click Apply so the type is added in the tree on the left.
- Click OK.
Taxes
Here you can configure which taxes you are required to use.
How to create taxes?
- Click on the Setup icon at the upper right of your screen.
- Select the Invoice tab, Page 5.
- Select the Taxes button.
- Click +Item to create a tax.
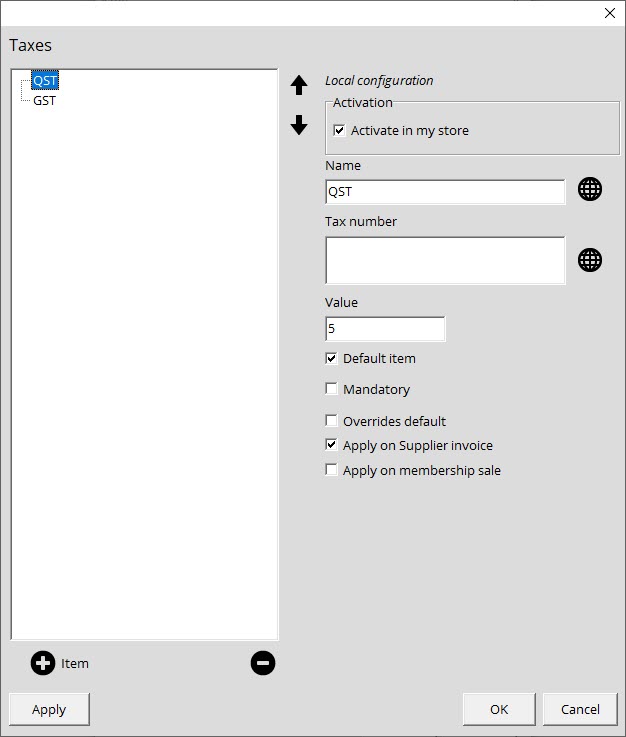
- Name the tax, GST for example. Make sure to check Activate in my store if it's applicable to your store.
- Click Apply so the type is added in the tree on the left.
- Click OK.
Cash Drawer
You can configure several virtual cash registers to manage your store's transactions.
How to create a cash register?
- Click on the Setup icon at the upper right of your screen.
- Select the Invoice tab, Page 5.
- Click on the Cash drawer button.
- Click +Item to create a cash drawer.
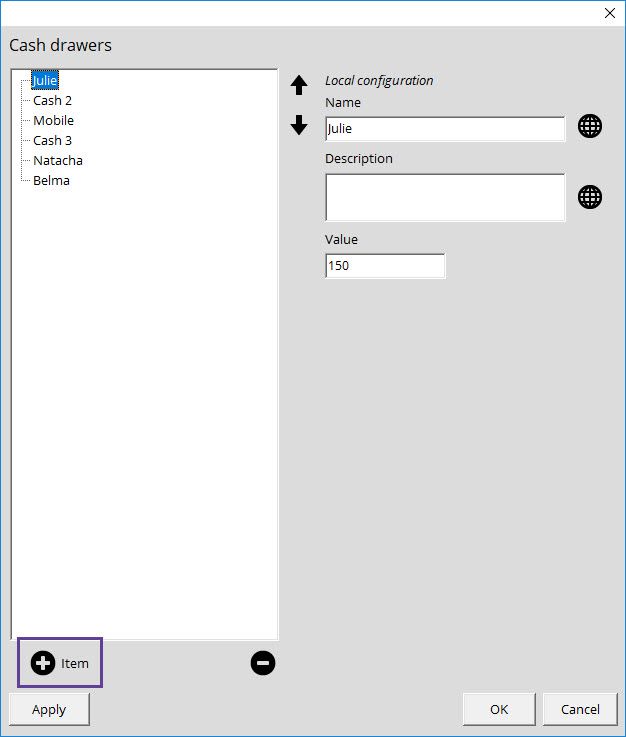
- Name the cash register, "Main register" for example. On the right-hand side, you can add any additional information you deem relevant to your cash drawer.
- Click Apply so the type is added in the tree on the left.
- Click OK.
Tax groups
You can set up a tax group that can be applied to contacts and products. For example, you can set a tax group called "Outside Canada" that would only include taxes that are applicable outside of Canada.
How to create a tax group
- Click on the Setup icon at the upper right of your screen.
- Select the Invoice tab, Page 5.
- Click on the Tax groups button.
- Click +Item to create a tax group.
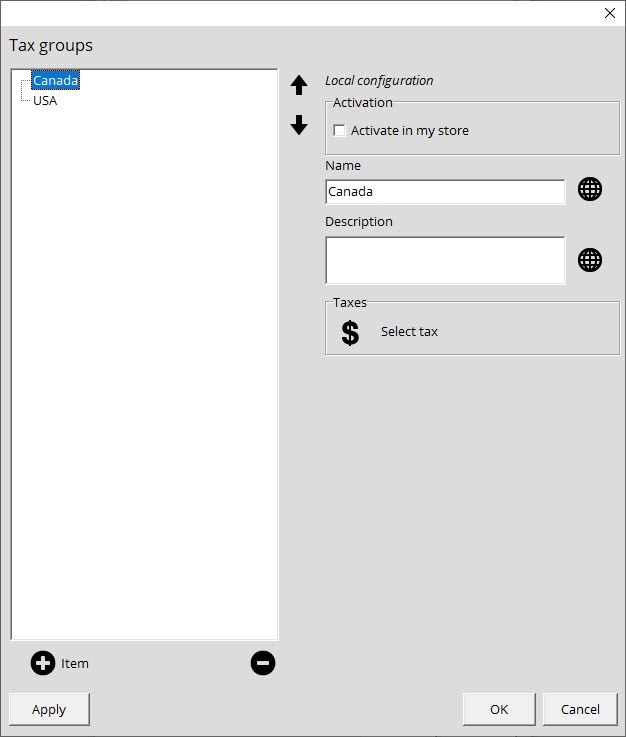
- Name the tax, "Outside Canada" for example. On the right-hand side, you can add any additional information you deem relevant to your tax group.
- Under Taxes, click the Dollar Sign icon to select the applicable taxes that you've created above
- Click Apply so the type is added in the tree on the left.
- Click OK.
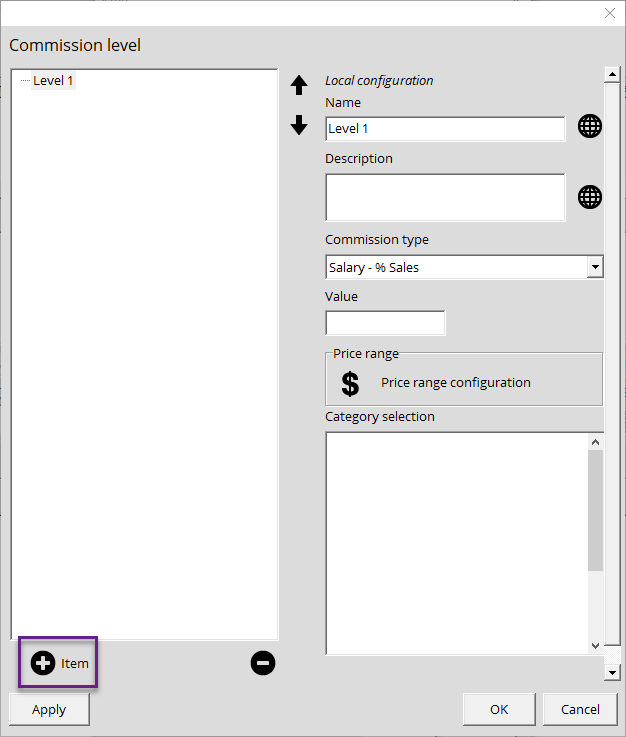
Commission Level
You can configure several levels of commission levels based on your employees' performances.
How to create a commission level?
- Click on the Setup icon at the upper right of your screen.
- Select the Invoice tab, Page 5.
- Click on the Commission Level button.
- Click +Item to add a Commission Level.
-
You then need to select the commission type: Salary – % Sales, Salary – % Margin or Bonus – Fixed Value.
- If you select Bonus – Fixed Value, you will need to add an amount in the Value block.
- If you opt for Salary – % Sales or Salary – % Margin, you will need to configure a price range in order to determine the bonus given based on the employee's sales performance.
- Finally, select the categories applicable to the Commission level.
Deposit
You can configure the pre-order amount that will be taken as a deposit. You can set amounts required for custom brackets of pricing. For example, everything between 49,99$ and 59,99$, a minimum deposit of 10$ is required. This option is primarily for our clients in the video game retail. Consignment section: These configurations are for stores that offer consignment.
- General consignment percentage: You can specify the percentage you want to assign when consigning items.
- Activate cost validation: When enabled, Alice POS will check if you have added a purchase price for your recorded items. If you entered $0, Alice POS will prompt a confirmation window confirming that you want to proceed to process the item at $0.
Interface
The Interface tab offers new features that let you tailor parts of Alice POS' interface to your liking.
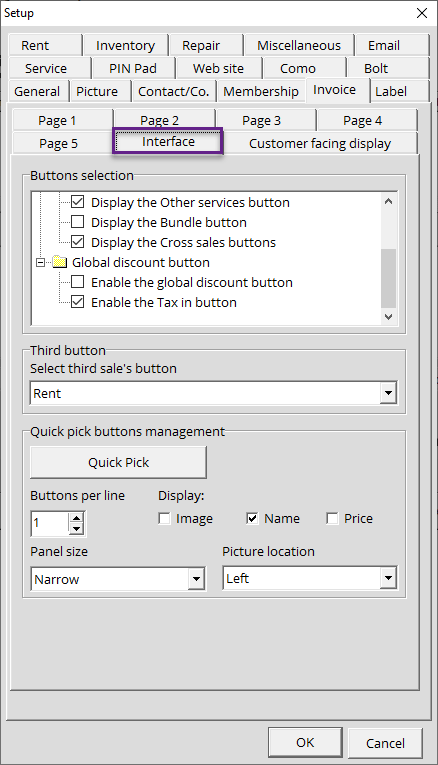
Buttons Selection
This section allows you to choose which Quick Buttons you are most likely to use regularly. These buttons will be displayed under the Search function, on the right-hand side of the Invoice module.
Third button section
Most of our customers asked us to let them select which third invoice type button they wanted. The drop-down menu lets users select their third most used invoice type.
Quick pick buttons management
This section allows you to choose which Quick Select buttons you want to see displayed in the Invoice module for quick access. For example, if you had configured the Food, Hunting, and Terminal buttons, you can opt to display only the Food button.
Please note that Repair type services can not be added as a quick pick button.
Customer Facing Display
The Customer Facing Display function allows you to use a 2 lines customer display device. Here's the list of compatible devices:
- G6U79AA: Customer display compatible with the HP RP2 and RP7.
- 1RL95AA: Customer display compatible with the HP Engage One.
- 3GS18AA: Customer display compatible with the HP Engage One.