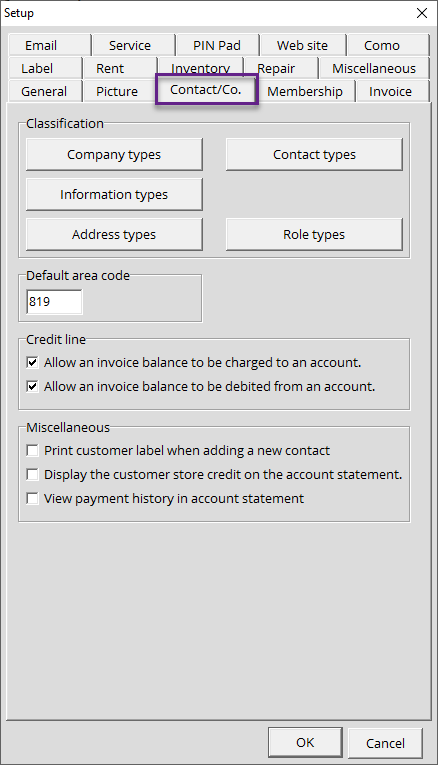
The Contact/Co. tab is used primarily to configure your contacts so they fit your business's reality.
Classification Section
This section is used to manage the information used for your customers' profiles.
. 
Company types
Creating company types can help you categorize the companies you will work with; suppliers, distributors, customers; for example. You can offer them targeted promotions easily thanks to this option.
How to create a Company type?
- Click on the Setup icon in the upper right corner of your screen.
- Select the Contact/Co. tab.
- Click the Company types button.
- Click +Item to create a Company type.
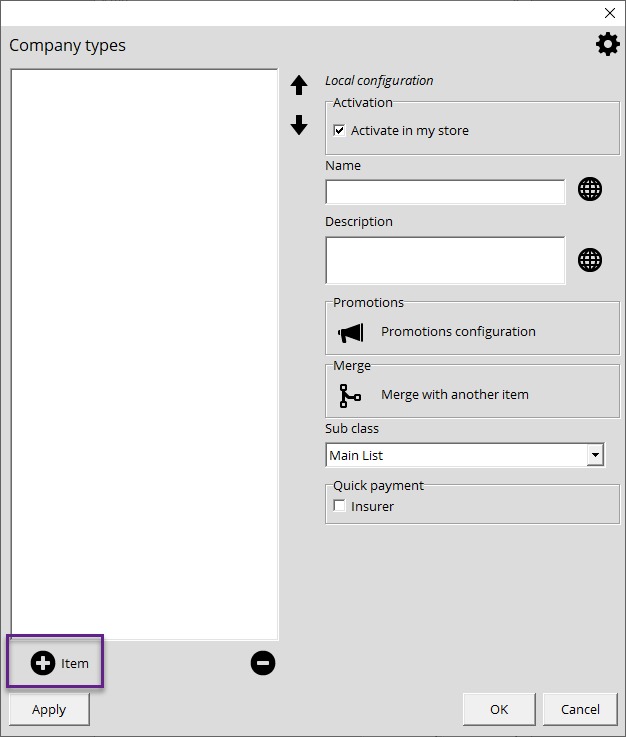
- Give a name to the type; Supplier for example. You can add a description, but it'll only be displayed on this page.
- Click OK.
- The created company type will be available under Company type in your companies' profile.
Contact type
You can organize your customers by contact type. For example, you can create VIP contacts, employees, sports teams etc.
How to create a Contact type
- Click on the Setup icon in the upper right corner of your screen.
- Select the Contact/Co. tab.
- Click the Contact types button.
- Click +Item to create a Contact type.
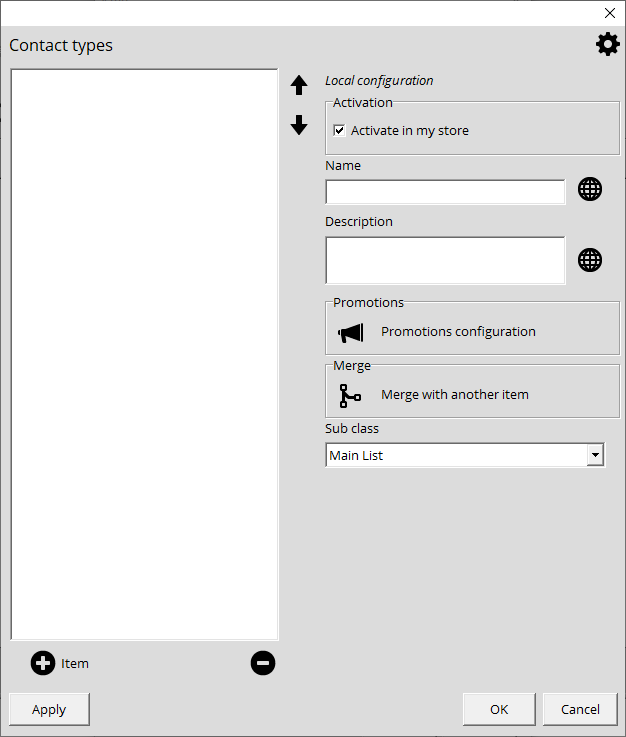
- Name the element, Employee for example. You can add a description, but it’ll only be displayed on this page.
- Click Ok.
- The created contact type will be available under Contact type in your contacts’ profile.
Information type
You can specify what information you want to store in your customer/company profile. It can be phone numbers, addresses, email addresses, driver's license, etc.
How to create an Information type
- Click on the Setup icon in the upper right corner of your screen.
- Select the Contact/Co. tab.
- Click the Information types button.
- Click +Item to create an Information type.
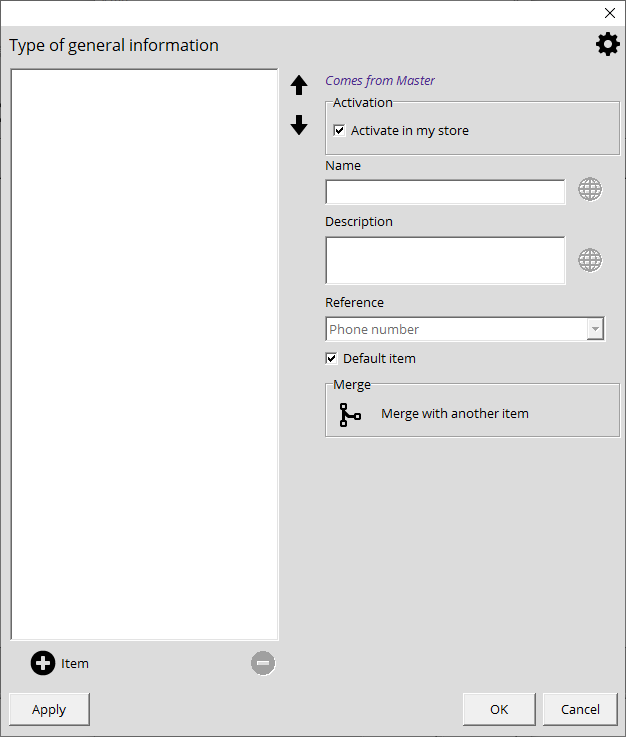
- Name the element in question, Email for example. You can add a description, but it’ll only be displayed on this page.
- Under Reference, select the type which matches what you need in order to preset the field.
- You can also check Default item so that this type of information is created automatically when adding a new contact to remind employees to ask for this information.
- The created information type will be available under the Information tab in your contacts/companies profile.
Address type
You can specify different types of addresses such a residential or commercial address for example.
How to create an address type
- Click on the Setup icon at the upper right of your screen.
- Select the Contact/Co. tab.
- Click the Address types button.
- Click " +Item " to create an address type.
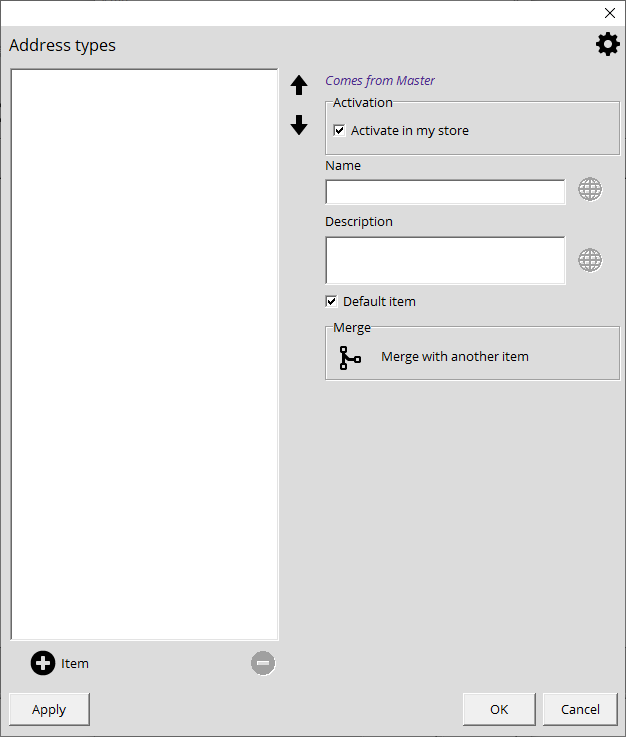
- Name the element, Residential address for example. You can add a description, but it’ll be only displayed on this page.
- You can also check Default item so that this type of information is created automatically during the creation of a new contact to remind employees to get this information.
- Click OK.
- The created Address type will be available under the Address tab in your contacts/companies profile
Role types
This is where you can configure the various employee roles you'll be able to assign to your staff depending on what they'll be allowed to do. For example, you can create Administration, Sales or Cashier.
How to create a role type
- Click on the Setup icon in the upper right corner of your screen.
- Select the Contact/Co . tab.
- Click the Role types button.
- Click +Item to create a role.
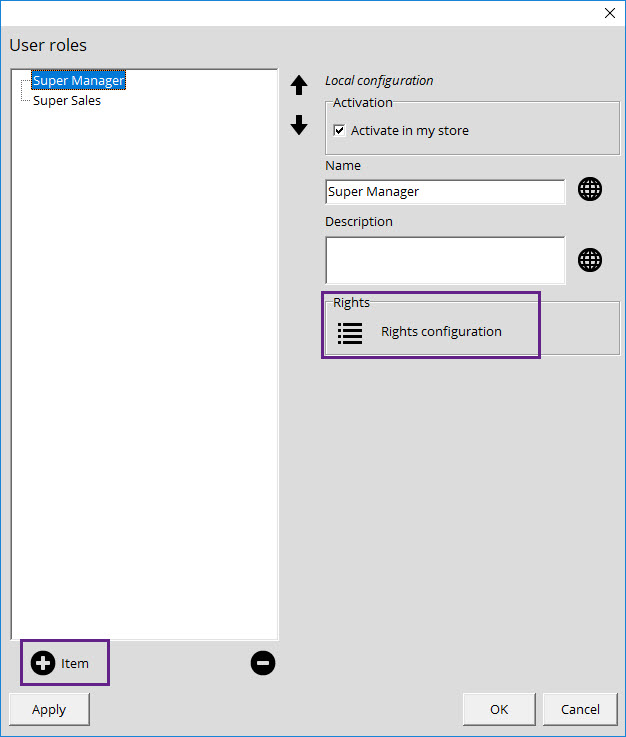
- Name the element, "Cashier" for example.
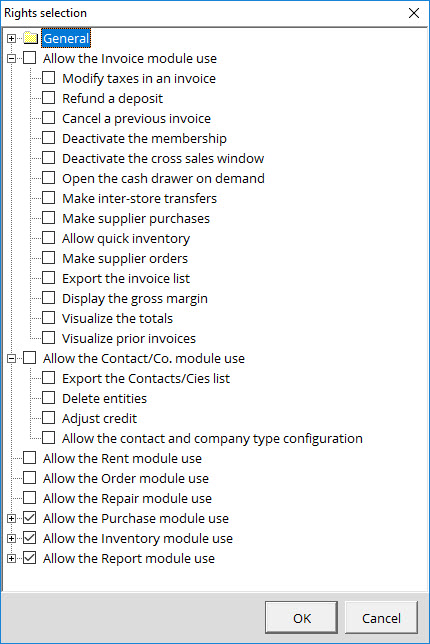
- Click the Rights Configuration icon and select which accesses matches the role type added. Click on the + icon to expand each section.
- Click OK once you're done selecting rights.
- Click Apply so the type is added in the tree on the left.
- Click OK.
Default area code
You set a default area code so the phone number field is pre-filled when searching and creating a contact.
Credit line
This option will allow employees to manage invoices that are charged to and paid from a contact's account.
- Allow an invoice balance to be charged to an account : This option will allow your employees to bill the contact/company's account to pay at a later time.
- Allow an invoice to be debited from an account: Allows crediting the account for a customer or a company.
Miscellaneous
- Print customer label when adding a new contact : This ID tag will allow you to find your contact quicker.
- Display the customer store credit on the account statement : For Accounting purposes, enabling this option will display the customer's store credit on their statement.
- View payment history in account statement : Enabling this option will display the customer's payments towards their balance.