
The Repair tab is used to manage options exclusive to the Repair module.
.png?width=438&name=7gsyx82f7593a14594bd98efd46dbd106e8f5%20(1).png)
Manage Section
Clicking on the Repair status button will prompt a window that will allow you to create your various repair statuses.
How to create a repair status
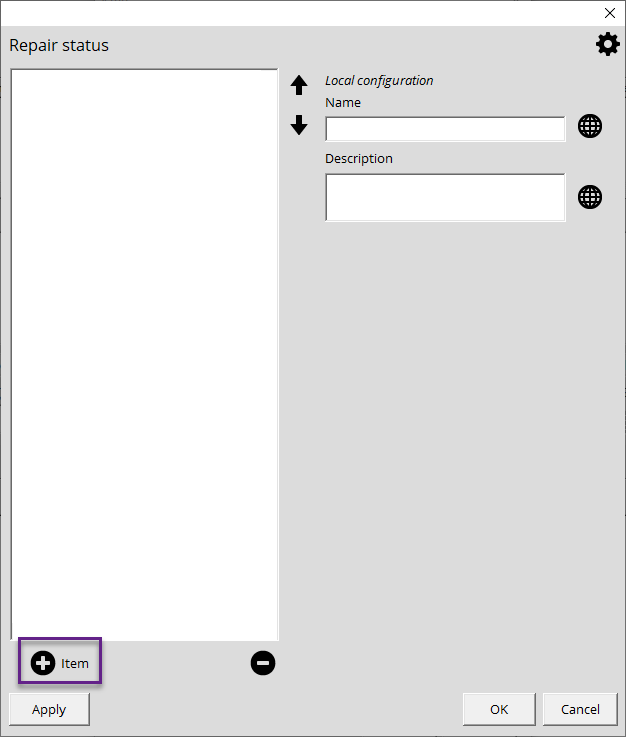
- Click on the Setup icon in the upper right corner of the screen.
- Select the Repair tab.
- Click the Repair status button.
- Click +Item to create a repair status.
- Name the status; "On-site installation" for example.
- On the right-hand side, you can add any additional information you deem relevant to your repair.
- Click Apply so the type is added in the tree on the left.
- Click OK.
Repair Contract
Some companies will create a service agreement in order to protect themselves and their customers. You can type or copy/paste your contract in the text box. For example:
" We cannot be held responsible for items that have not been claimed within 30 days of repair. For more information, please contact us at 888-888-8888 ."
Check the box if you want to print the service agreement and you can also print as many copies as needed.