
Please note that the new Bolt payment method is only available to US users of Alice POS.

Configuring Bolt
Connecting to Wi-Fi
The first thing that you need to do in order to set up your Clover or Ingenico device, is to connect it to your Wifi. While the Clover Mini can be connected with an Ethernet cable, such is not the case for the Ingenico ISMP4 device.
Ingenico - ISMP4 model
- First, you need to access the device's Bolt S.O.S. Menu by pressing F, 7, 6, 7 on the device's number pad.
Using the F1, F2, F3, and F4 keys to navigate left, down, up and right respectively - Press F2 until you reach Wifi Properties
- Press the Green button to enter the menu
- Press the Green button once more to Scan for networks
- Use F2 to scroll down the list and press the Green button to select the correct Wi-Fi network
- Enter the Wi-Fi password using the multi-tap method or the on-screen keyboard (depending on your device type)
- Press the Green Button to acknowledge the Profile for created message
- The iSMP4 Ingenico device will reboot
- Once rebooted, if the configuration was done successfully, the device will display Bolted
 If you need help or require additional information please consult the official iSMP4 document.
Clover Mini
- Tap Configure next to the Wi-Fi option.
- From the list of available wireless networks, tap the name of your wireless network. (If your network isn't listed, tap Add a New Network and then tap the network by name.)
- Enter the network password.
- Tap Done.
- Tap Check Connection.
- If successful, you will go through the activation process. Otherwise, you'll be prompted to select a different network or re-enter the Wi-Fi password.
If you need help or require additional information, feel free to consult the official Clover document.
Activation
Under this section, you can enable a connected Bolt terminal and select the proper Terminal brand: Clover or Ingenico.
Connection Parameters
This is where you configure your Bolt device so it can be in synch will Alice POS.
Requests parameters
- Enable terminal beeps: This will make the device beep until the card is inserted and removed.
- Prompt for amount confirmation on every transaction: Will require customers to confirm the total amount of the transaction.
- Prompt for ZIP during transactions: Will ask the customer for their Zipcode to validate the transaction. Applicable only to Ingenico devices.
- Prompt for signature for all transactions: Will prompt customers for their signature to validate the transaction.
- Print transaction receipt on the terminal: Receipt transaction will be printed on the payment terminal. Applicable only to Clover devices.
- Allow manual entry: Requires store clerk to manually enter the credit card number. Once this is enabled, please go to Tools > Card Connect: Bolt > Manual Entry Card so it can be used for the next card.
- Prompt for CVV during manual entries: The CVV code behind the card will be required to complete the transaction.
Tips
- Enable tips: Allows you to enable/disable the tip functionality
- Allow custom tip amount: Lets your customers decide the tip amount
- Display total (tip+invoice): The total displayed includes the tip selected
- Preset percentages: Alice POS users can set 3 different pre-configured percentage for tips
Additional options
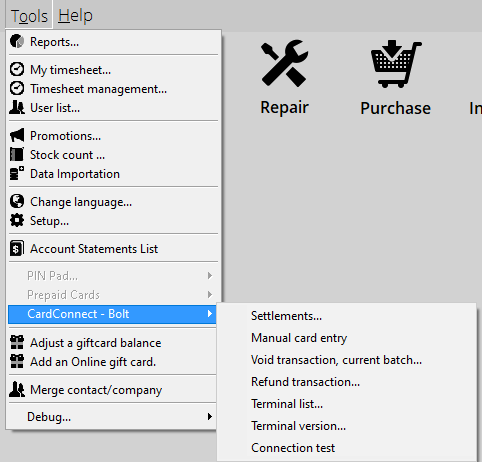
Once you're configured Bolt and using it, we also have additional options to offer you the freedom to manage your device under Tools --> CardConnect - Bolt:
Settlements: Allows you to print the list of Bolt transactions with the batch number found on your invoices.
Manual card entry: Enabling this will require the next Bolt card to be entered manually into the terminal.
Void transaction, current batch...: Allows users to cancel a transaction from the current batch of transactions.
Refund transaction: This option allows users to refund a Bolt transaction.
Terminal list: This option will print a list of current Bolt terminals connected to Alice POS.
Terminal version: Displays the terminal's version
Connection test: Allows users to test the Bolt terminal connection. Useful to determine possible issues.
Troubleshooting Bolt
While very unlikely, it is possible that certain errors will occur with Bolt. Here are the few different error messages that can pop up and how to fix them:
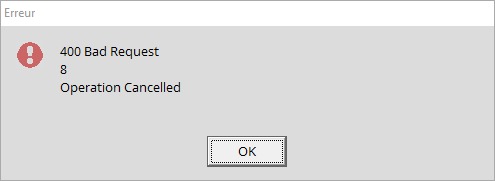
This error will prompt if a customer hits the Cancel button.