
It is strongly recommended to fill in information with the help of your accountant to ensure all the information is properly entered in.
To properly assign all the required information, take note that it may take several hours to properly configure.
Creating your Grand Ledger Account Numbers
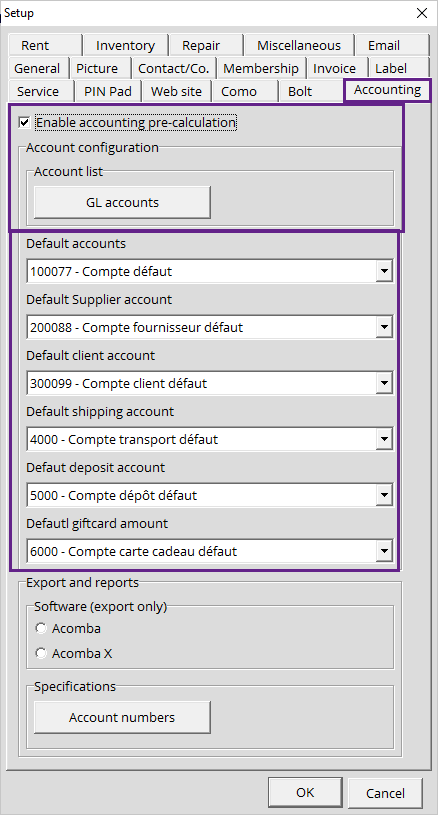
- Go into the configuration menu and click on the Accounting tab. Once there, activate the Enable accounting pre-calculation button and then click on the GL accounts button.

-
In the GL accounts window, click on the + button to create a new entry- You can name it- You can add a description- The Value field is where you add the account number.- You must assign the general account type
This information should be filled out with the help of you accountant or someone who knows the account numbers and types.
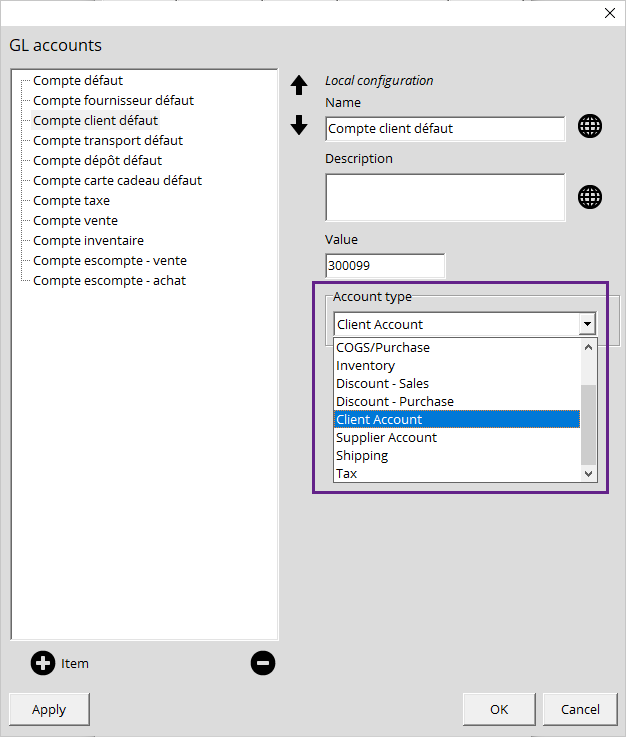
If default accounts arent assigned, all information may end up as being assigned to the 0000 - General account
Assigning your Accounts to your Inventory Categories
- To start, go into your Configuration menu and go to the Inventory tab. Click on the Inventory categories.

- In the Inventory cateogries, select the category and scroll down to the bottom of that window to see the account entry. Assign your accounts here.
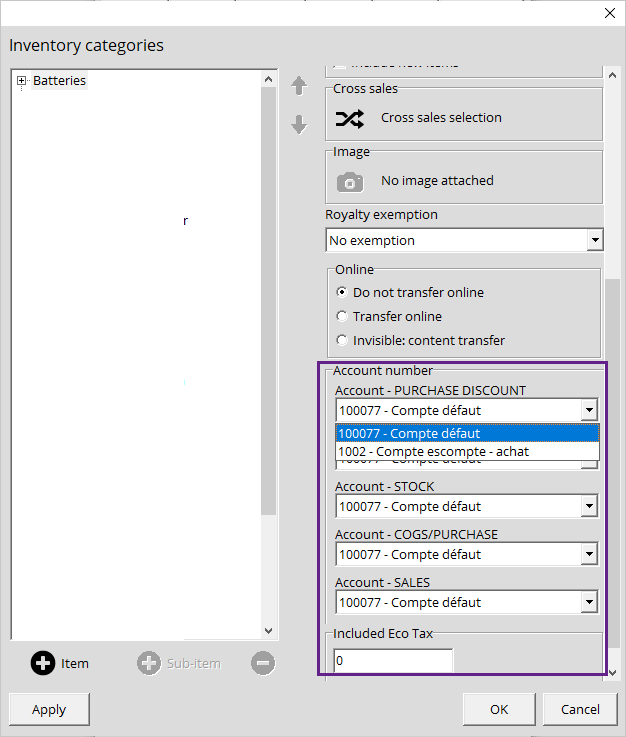
Once an account number has been assigned to a parent category, the information will be automatically applied to all the sub categories.
SHould you wish you assign different account numbers to sub categories you can celect the sub category and assign the information
Assigning Account Numbers to Product Attributes
- Go into the Configuration window and click on the Inventory tab. Once there click on Product attributes.

- In the product attribute window, select the product attributes in question and scroll down to the bottom to assign the accounts.
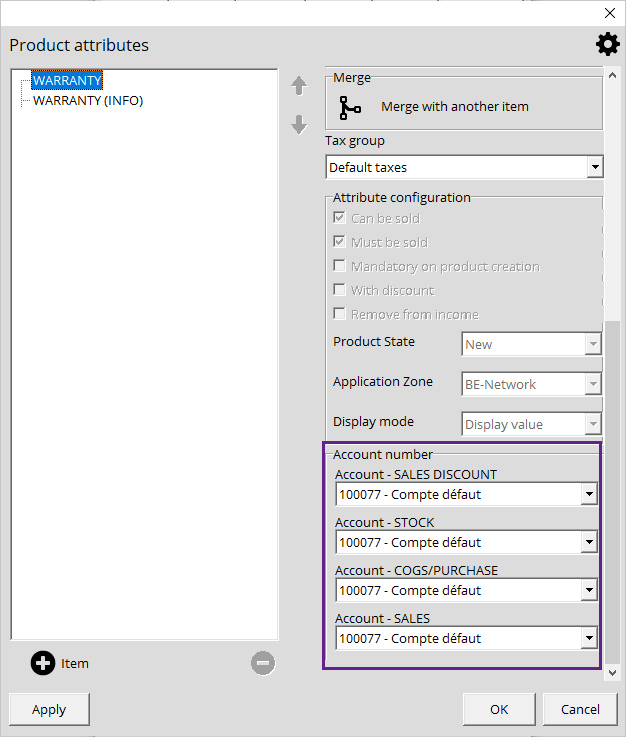
Do not forget to hit the Apply button to save your modifications.
These fields only need to be configured IF you have attributes that you sell
Assign your Accounts to your Services
- Go into your Configuration and click on the Service tab. Once there click on one of the service buttons. (This depends on the types of services you have active in your system)
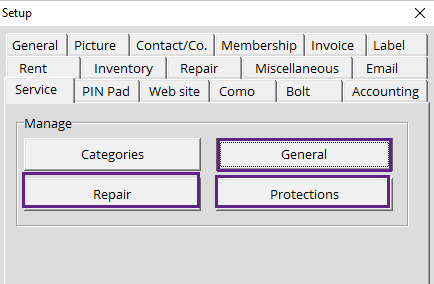
- Once you've click on one of the applicable service buttons, General, Protection, Repair, select the service and scroll down to the account number fields.
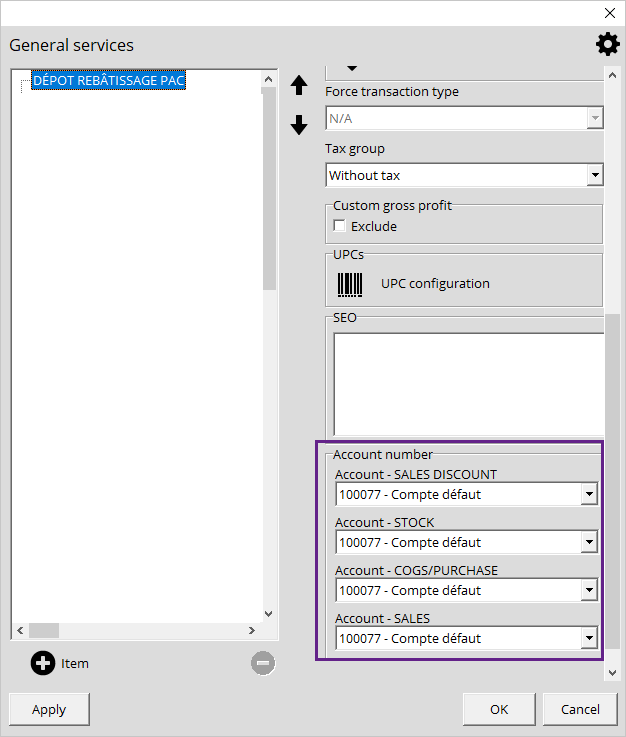
Do not forget to hit the Apply button to save your modifications.
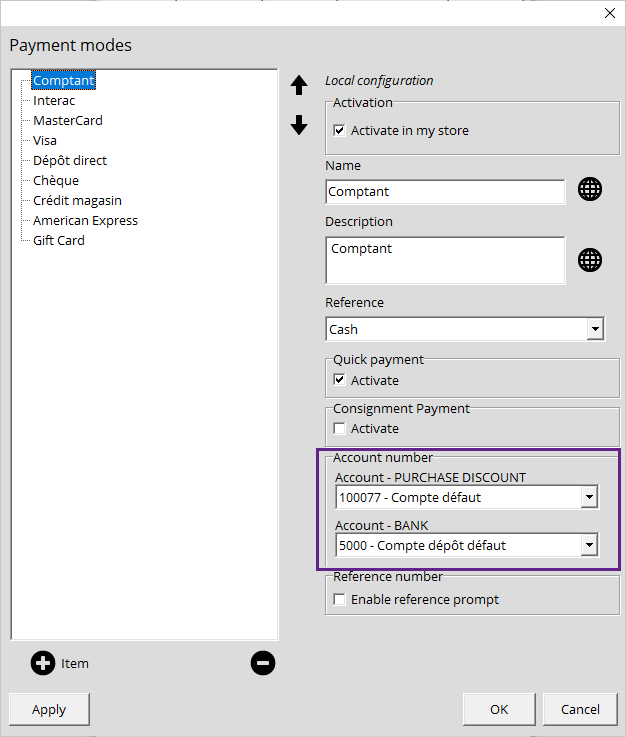
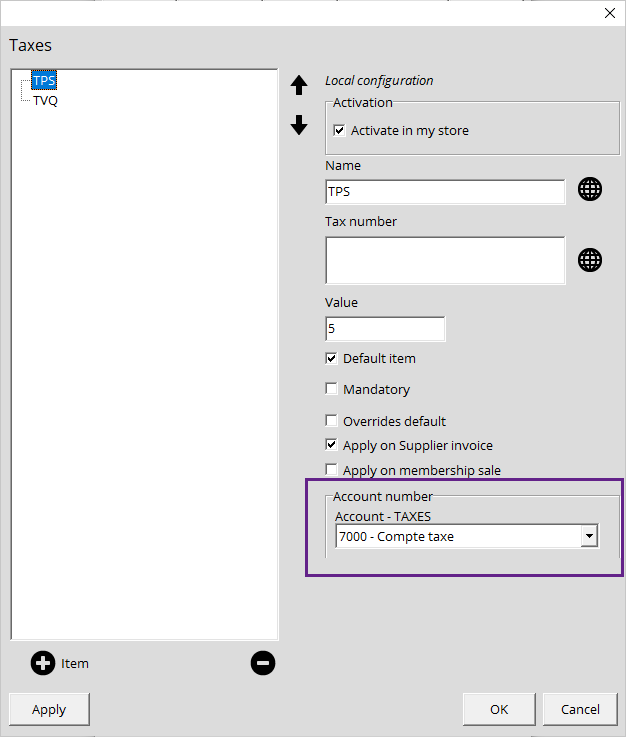
Assign your Accounts to your Payments and Taxes
- Go into the Configuration and click on the Invoice tab.
- Click on the Payment modes button. Once everything has been assigned, return and click on the Taxes button.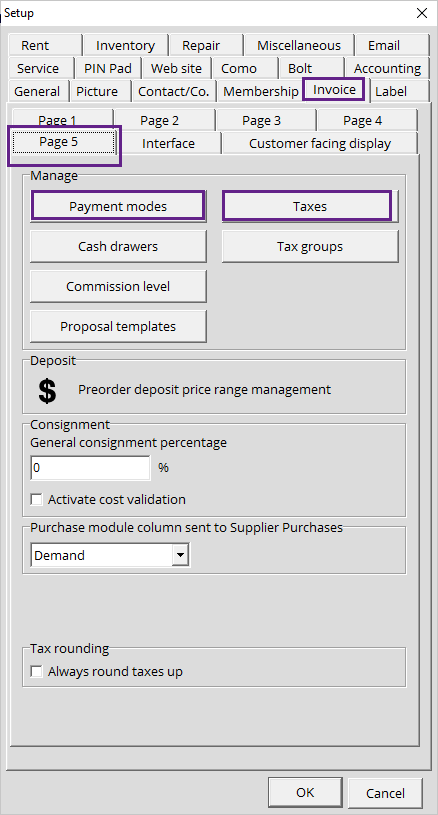
- In the Payment modes window, select your payments and assign their accounts.
- For your Taxes, select your taxes and assign their respective account.
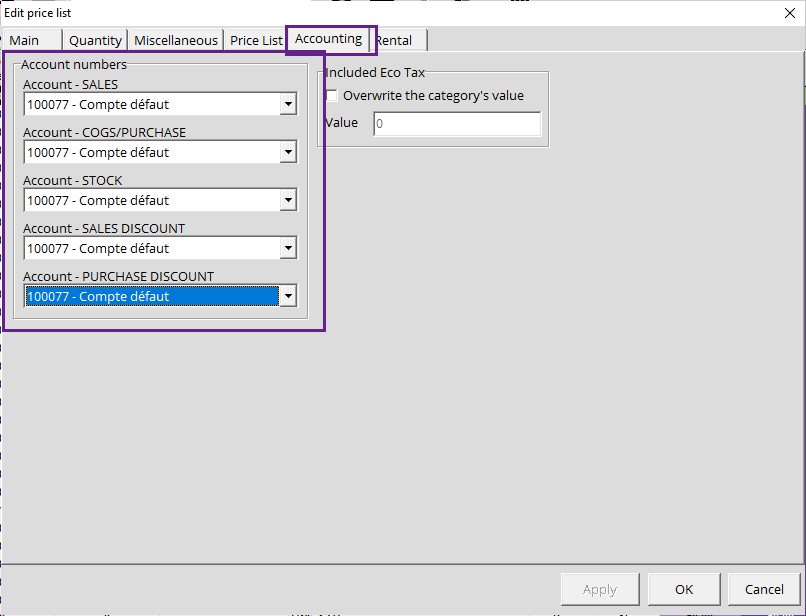
Assign Accounts to a Specific Product
- Go to the Catalog and double click on the time you wish to modify.
- In the product modification window, click on the Accounting tab. Once the accounts have been assigned, clock OK.
You have now completed the configuration of the GL accounts in Alice and can now make use of the new GL reports, GL Account list, GL Journal, GL Summary.